


Wiring Ranunculus and More
We’ve all done it. You’re about 99% of the way done with the bouquet: just a finesse here, a little petal clean up there, and then all of a sudden… snap. That perfectly-placed, showy, ruffly ranunculus head is broken.
Sigh.

Like all things with floral design, a little prep work can save you from just about any fumble. In this case, wiring can not only save a ranunculus head, but can prevent breakage altogether!
Wiring has always been a core floral design practice and with the advent of loose, airy, and light bouquets it’s more relevant than ever. Wiring can save a broken flower head as well as support damaged or thin stems, ensuring a more reliable performance. Although my favorite use for wired flowers is in the bouquet, wired flowers can be used in boutonnieres and corsages, to weave bloom heads into garlands, or even to fasten in large scale installations like flower ceilings, chandeliers, and more.

While there are a variety of wiring techniques for each different bloom type, all floral-wiring has a few key considerations:
1. Select the right gauge wire. Gauge refers to the thickness of the wire. Gauge goes from large to small, so a lower gauge number means it’s a thicker wire. Selecting the correct gauge is an essential step: choose one too thin, and it may not provide the support you need. Choose one too thick, and you might damage your flower head or not get the movement you need. Choose a medium to high gauge wire for flowers with hollow stems, small flower heads, or for blooms that should float. Choose lower gauges for structural support, for elongating stem-length, and for thicker-stem blooms. I recommend a little bit of experimentation to figure out what works for you. For instance, I like to typically use a 22 gauge wire for ranunculus, but I know some people who prefer a thinner gauge. So hold on to broken heads or grab those post-wedding blooms to find the gauge that works for you.

2. Strategic insertions. Inserting your wire in the wrong place can tear through petals or stems, damaging a flower so much it’s no longer usable. Additionally, wiring in the wrong spot can be difficult to cover, leaving unsightly mechanics in your otherwise flawless floral creation. Again, different bloom types require distinct approaches, but there are a few favorites. I frequently utilize the “hairpin” method for ranunculus (see here!), disc shaped flowers, and even certain foliages. Other techniques include inserting the wire up into the flower head or through the stem or calyx (that large bulge under the rose head).
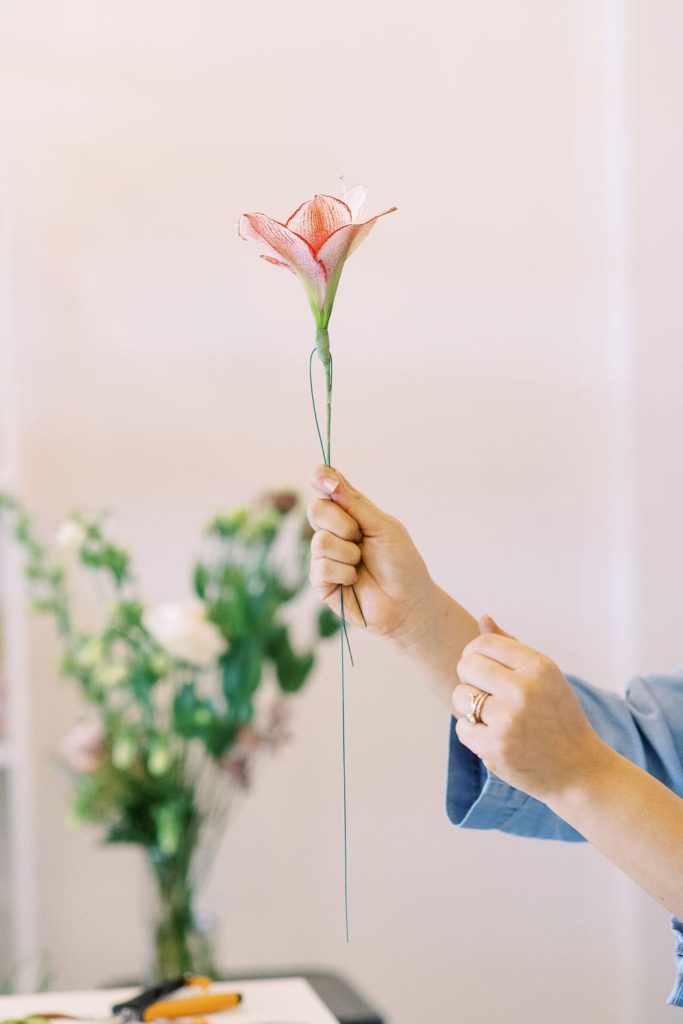
3. Activating your tape. I remember when the only floral tape available used to be a dark, jade green (gasp!) and, boy, do I prefer the subtlety of the sage shade or the brown. This camouflaging tape is an essential final step in your flower wiring. Not only does it hide your clever wire hack, it also secures the wire to the stem. To activate the floral tape, sttttrretccchh it and apply pressure as you wrap it around the stem and wire.
Wiring does more than just save a broken flower head or provide support. Wiring can allow you to get a bloom to face in the perfect direction and will remove extra weight and bulk from bouquets.
I hope this technique helps you make the most of every stem, broken or otherwise! And don’t forget to take a photo and tag me in your wiring successes @thefloralcoach!


Previous Post:
Next Post:
I think you'll also love reading...